 In this tutorial I assume that you are using Cubase SX or some similar sequencing program & Drumkit From Hell samples. I hope that you are familiar with the basic techniques using Cubase editing program. In this tutorial Im also using virtual VST instument plugin called “Battery” for loading drums inside Cubase.
Mixing and recording real or sampled drums can be challenging task for everyone. It’s way harder if you compare it for recording insturments like electric guitars and bass etc. You should really make good effort trying to create good sounding balance, when you are mixing your drums. In my recordings I use VST instrument called Battery.
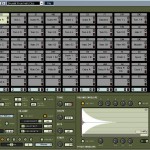 Battery is like virtual drum machine where you can load selected drumparts & samples like kickdrum, snare’s, toms, hi-hat & cymbals. Drumkit from Hell sample library allows you to load several different drumsets at once, using two battery plugins at the same time. This way you can hear close mixed drums & ambient drums playing together at the same time.
STEP 1: Create new midi track using Cubase project window. You can name it (closed_drums) if you want. Second you should load battery plugin using Cubases virtual instrument “box” (click on the picture). When the drumset is loaded, you should go to battery plugin options and change output channels to 5. This way you get five different drum channels on to your mixing console.This gives much better potentiality when mixing your durmtack using separate mixer tracks. You can mix track volumes and pan drumparts in different ways.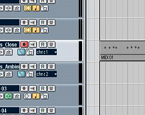
STEP 2: Left side from midi track, you can see In & Outputs for every isolated tracks. Set battery plugin to your output (click the picture). After that use Cubase pentool to draw something on the midi track.
STEP 3: Open Cubase “Drum editor” window located from cubase top menu. Remember to activate miditrack before going into drum editor. Ok you should now see the drum editor (i hope you do). On the editor you should see correct drum names on the left side, if not load dfh drummap file located in your DFH Sample Cd. (click on the picture). Try hitting some notes using drumstick tool. You should hear drumsamples when you insert notes. If you dont hear anything repeat Step 2.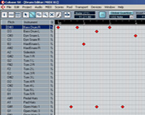
STEP 4: Now we will create some basic bass kicks in the drumeditor window using drum stick tool. Note that you can change note velocities from different notes. That way you get your drum sound more realistic. listen the sample.
STEP 5: Next it’s time to insert some snare hits on the drumtrack. You can use different snares & velocitys to make snare sound more authentic. You can add some reverb on the snare channel later, when mixing the final drums. Listen the sample.
STEP 6: Third insert hi-hats, cybals and tom’s in the same way. You can experiment differend fill’s and velocities using your own imagination. Here’s the sample.
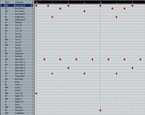 Now you have your first beat ready! Now load battery nro.2 (load room samples into battery 2) and name the midi track etc. “Ambient_drums.” Repeat all basic steps again. The idea behind this is just to copy “closed drum” midi track and paste it below the first midi track. This way Cubase will playback close & ambient drumset’s together. Using Cubase
Project window you can easily copy Drumparts, and then alter some notes in the bars. That way you can save alot of time when making drums in your song…
Here you can listen finished DEMO where im using the same drumtrack that we used in this tutorial. I hope you did understand me correctly ;D If not, you can contact me via email webmaster@wilisnetcorner.com
